The "water" in Sausalito is high gloss medium (buy at any art supply/crafts store) painted over acrylic colors on a flat surface. Its about 1/16" deep. Unfortuneaely the surface of the water is soft and slightly tacky. Dust that settles on it gets stuck and can't be cleaned off. This ruins the appearance of the artificial water as real water can't get dusty. So about once year when the dust gets really obvious, I renew my troubled water. It only takes a few minutes with a paintbrush. I documented the procedure in a series of photos (right).
When painting the new layer of gloss medium, use a wide stiff brush and stipple the medium onto the surface. Load the brush with medium and hold the brush parallel to the wave direction and dab it onto the surface. With a little practice you will find you can make waves with thick areas of medium. The medium is white at this point, but it will dry clear. Real thick waves may take several days to completely clear.
For whitecaps, mix a little titanium white acrylic paint into some medium and paint the whitecaps on after the base coat has dried. This is also how you can make boat wakes as well as waterfalls and rapids.
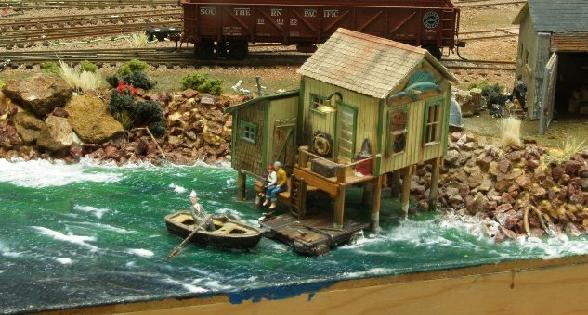
The trick to realistic water is the colors. Water is not blue - that is the reflected sky that you see. In fact most water in ponds and streams is actually green or brownish green from algae growing in it, or tan in color from dissolved sediment (i.e. Mississippi River water). For smaller bodies of water on a layout, the colors you see will be the mud near the shore and as you get into deeper water, the water will start to reflect the color of the sky (i.e. the backdrop) and surrounding scenery. A dark color is all you need and the reflective propoerties of the gloss medium will do the rest. I used a dark green mixed with a some black for the deep water color in my harbor. For highlights I mixed in green here and there to make water appear to be moving, mixing in more green towards the shore where the water is shallower. For clear river bottoms, make the shore a muddy color using your base scenery color and mix in black towards the deeper part of the river. For a muddy river just mix in some black into the muddy color as the water gets deeper. Don't put any color into the gloss medium itself as it dulls it somewhat.
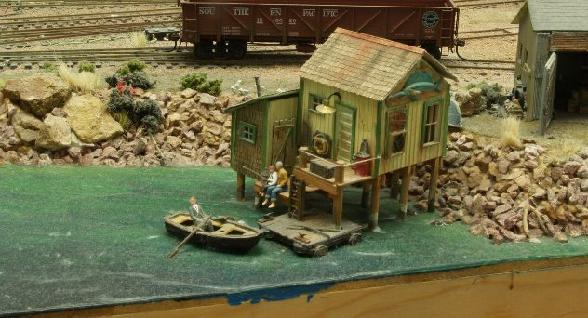
Dusty water and scenery looks dull
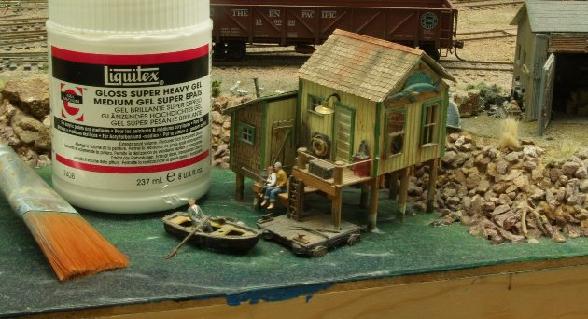
A layer of gloss media and a brush will be used to fix it up
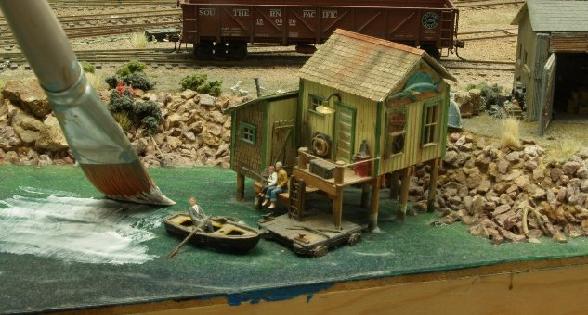
spread the media with a brush to make wave patterns.
While I was renewing the water, i washed the dust off the shore and track by spraying on "wet" water (water with a small amount of alcohol mixed in). This is a quick way to freshen up most scenery. I have tried vacuuming, but my dust sticks too tightly to the surfaces. No matter how careful I am, the vacuum tip always ends doing a "Godzilla" imitation and knocking over and breaking buildings and trees!
The media has been used to make a parallel wave pattern diagonal to the shore
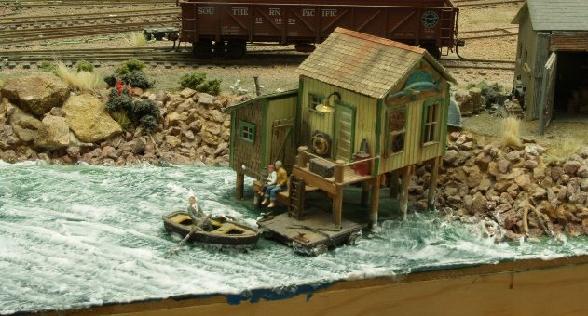
As the media dries it turns clear.
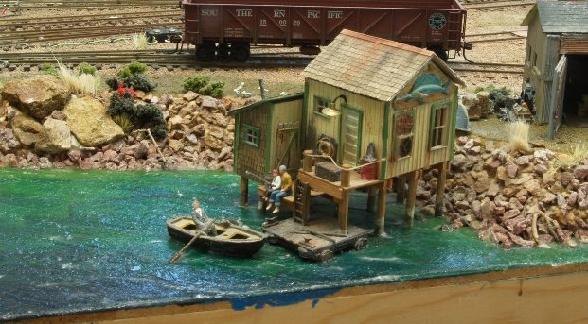
The new shiny "wet" water and freshened scenery.
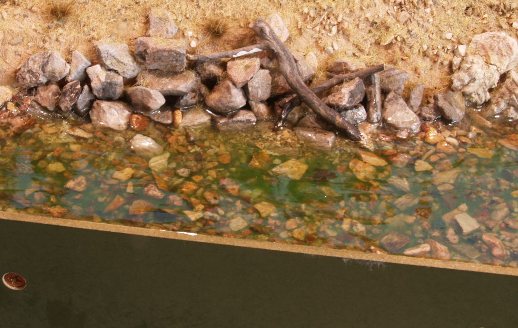
Truckee River is made from cast plastic
The other way to represent water is with cast plastic such as
Envirotex®. This is easier to keep clean, just wipe with a damp rag, but
harder to make look wavy. Its works great where you want flat water
surfaces. The plastic comes in two parts which you mix just before you
pour. The other advantage is you can put in bottom detail, such as
rocks and logs, which you can see through the water. For the truckee
river, I wanted this effect more than the rippled surface so I used
Envirotex® poured over a rocky bottom. I mixed in some green and brown
paint into the Envirotex® to give it some murkiness. Experiment with
your paint in a little bit of Envirotex® to make sure it mixes well
before you commit a entire batch to the coloring.
In theory you can carve waves into the Envirotex after it has partially set. In practice, finding the right moment for this is very tricky. Too soon and the waves settle out before it sets; too late and the edges of the waves look like cut plastic instead of water. You can also put on waves the glossy media after the plastic sets. White water can be done with glossy media mixed with white paint.
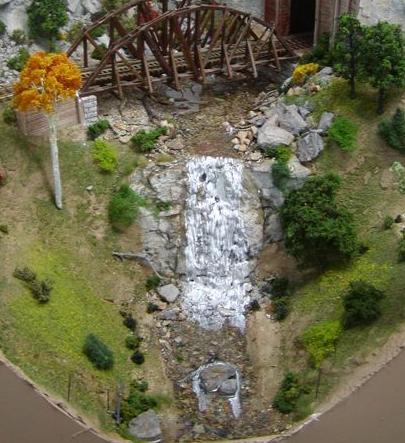
Finally, here is a stream using both high gloss medium and cast plastic. The stream was first poured in plastic and when that was hard the waterfall and the rapids were added using gloss medium mixed with titanium white acrylic paint. The high bridge seen in other photos over the waterfall has been removed temporarily for this work.